Adding a client
Adding a client sets up everything you need to start seeing a child or young person on Pluto. Each client gets their own private room for sessions. You can also store contact details for scheduling sessions and sending session invites.
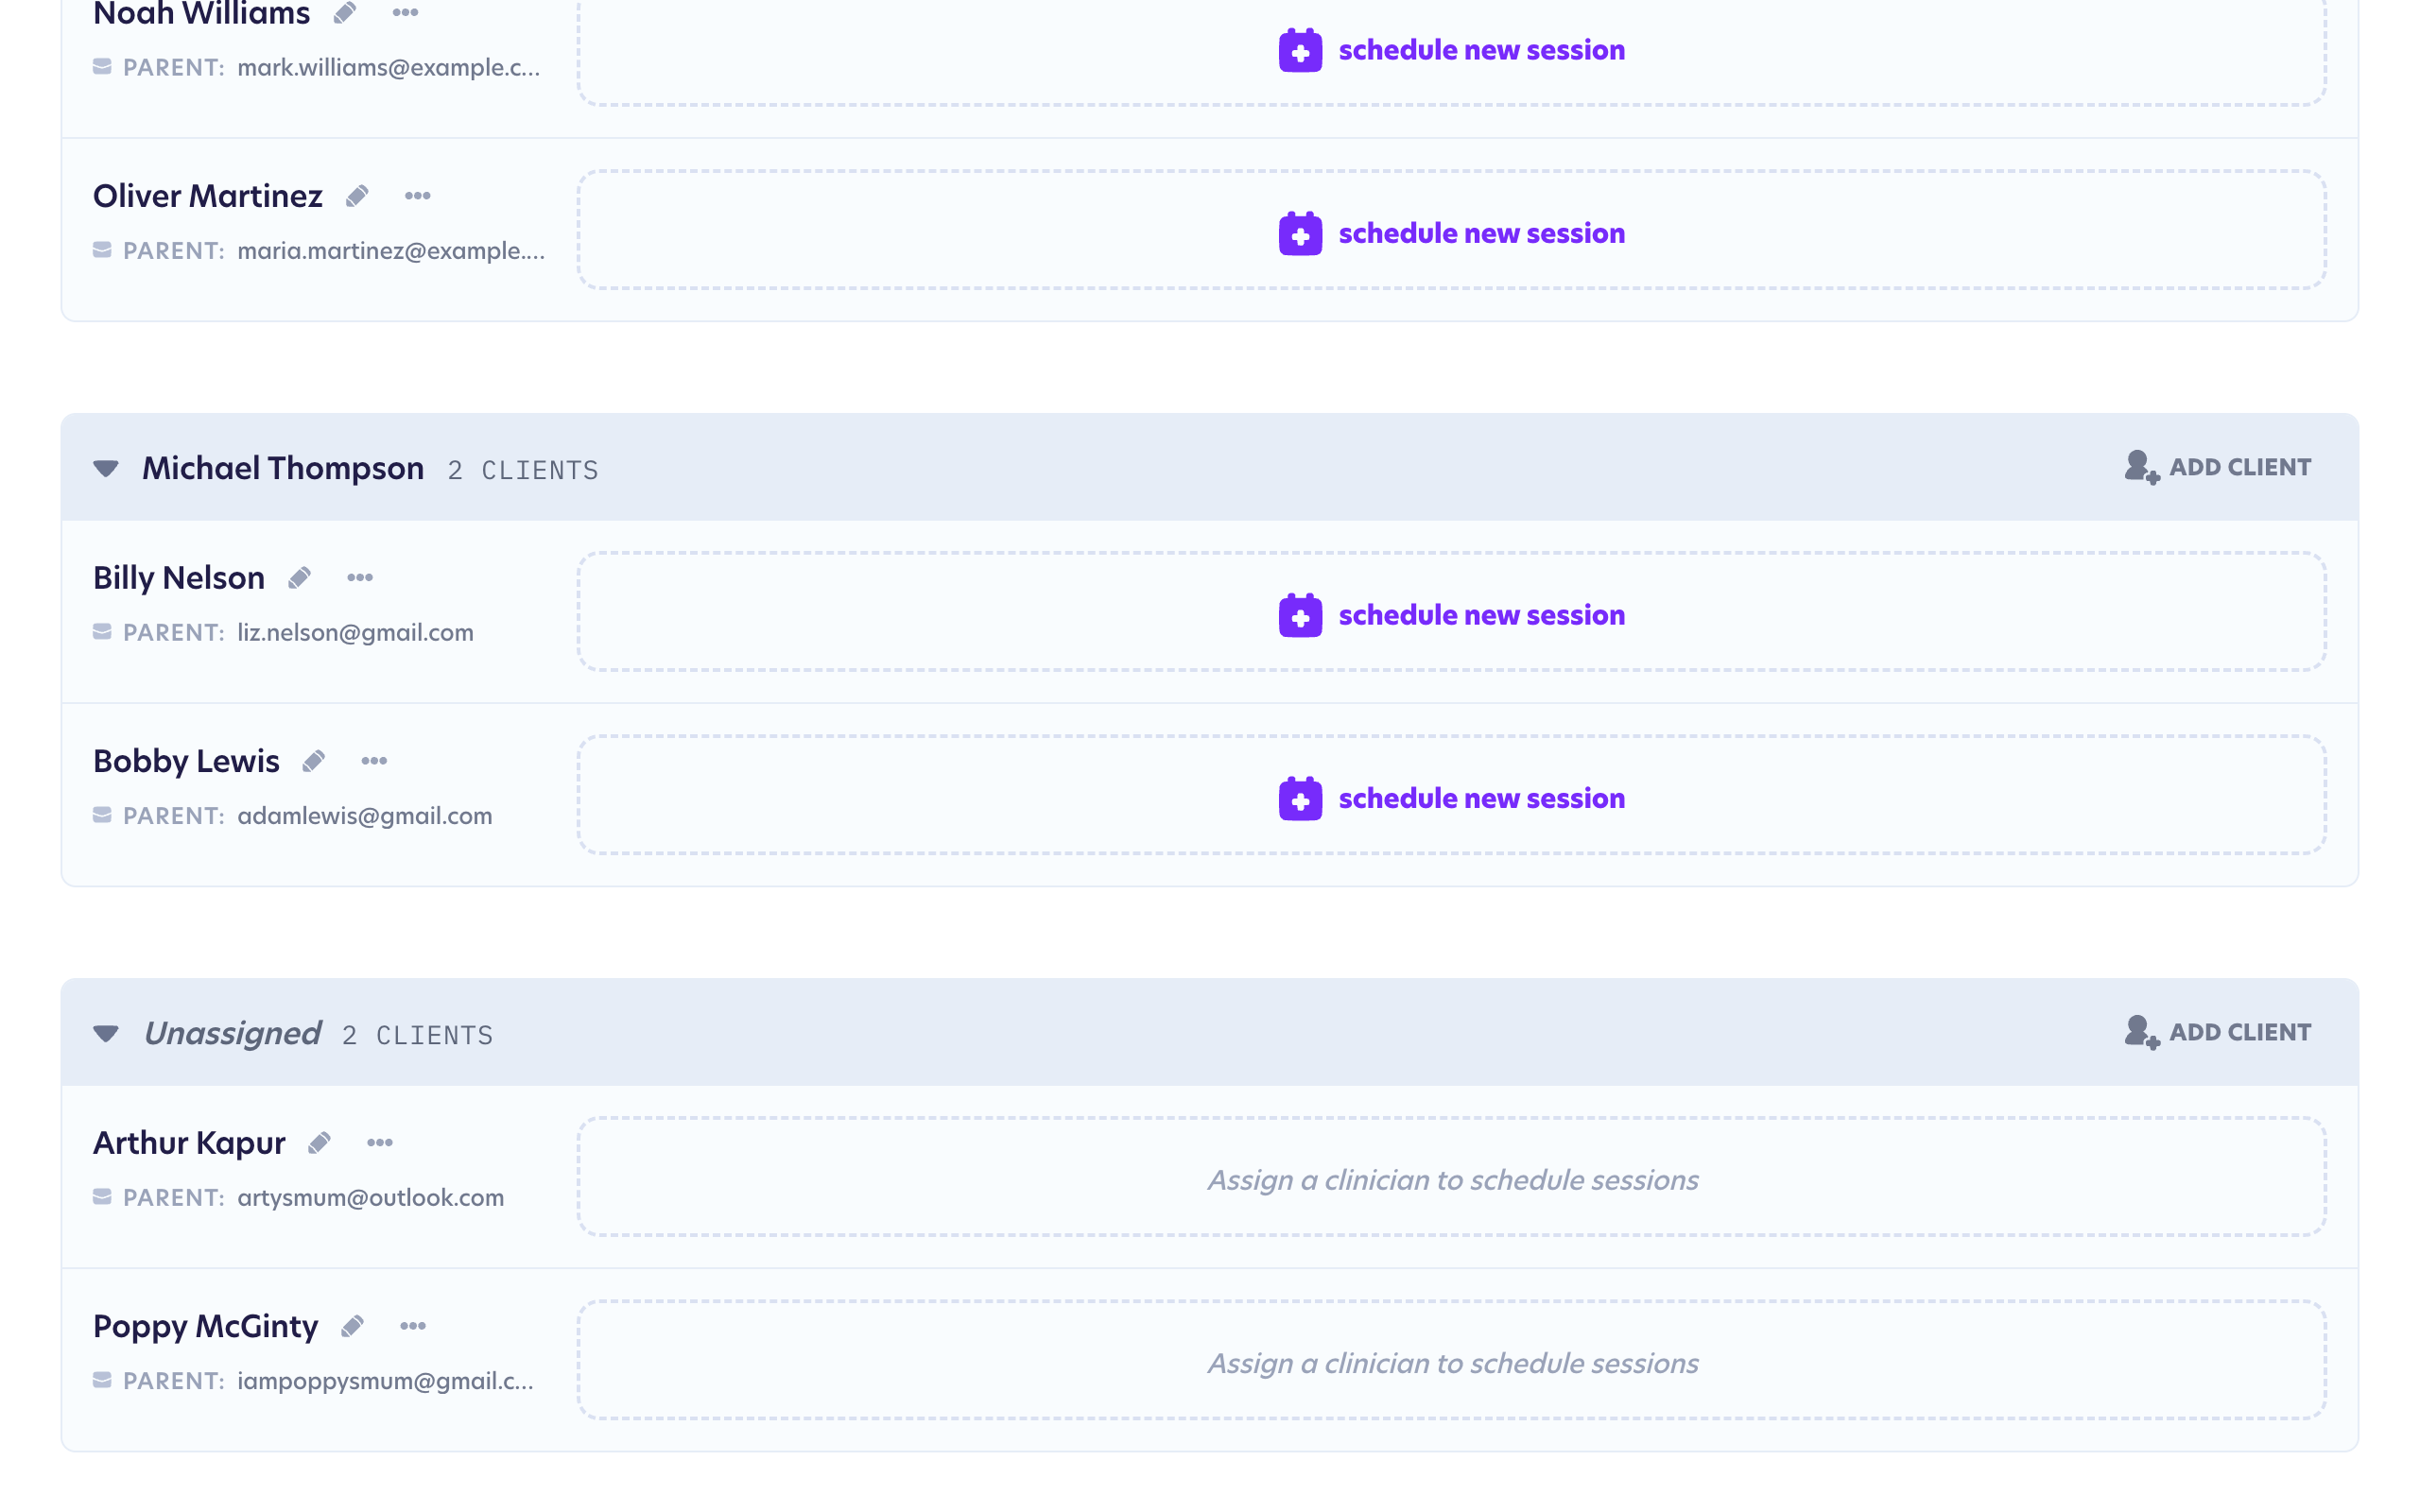
As an admin, you'll always manage clients from the dashboard's Table view, which groups everyone by their clinician. Read more about the difference between views in Display settings.
Adding a new client
You can add a client straight from your dashboard. Click New client at the top of the page to open the Create new client form.
Client details
Start by entering the child's first name and last name. These are the only required fields, so you can set a client up in moments and fill in everything else later.
The name you enter here will be used to greet the child when they join their first Pluto session. Clients can choose a different name to use during their sessions but this does not affect the first name and last name on their profile.
The admin version of this form includes just the details needed to set a client up. You don't need to choose a character or room name, these are automatically chosen at random behind the scenes, so there's one less thing to think about. The client can change their character later when they join their first session.
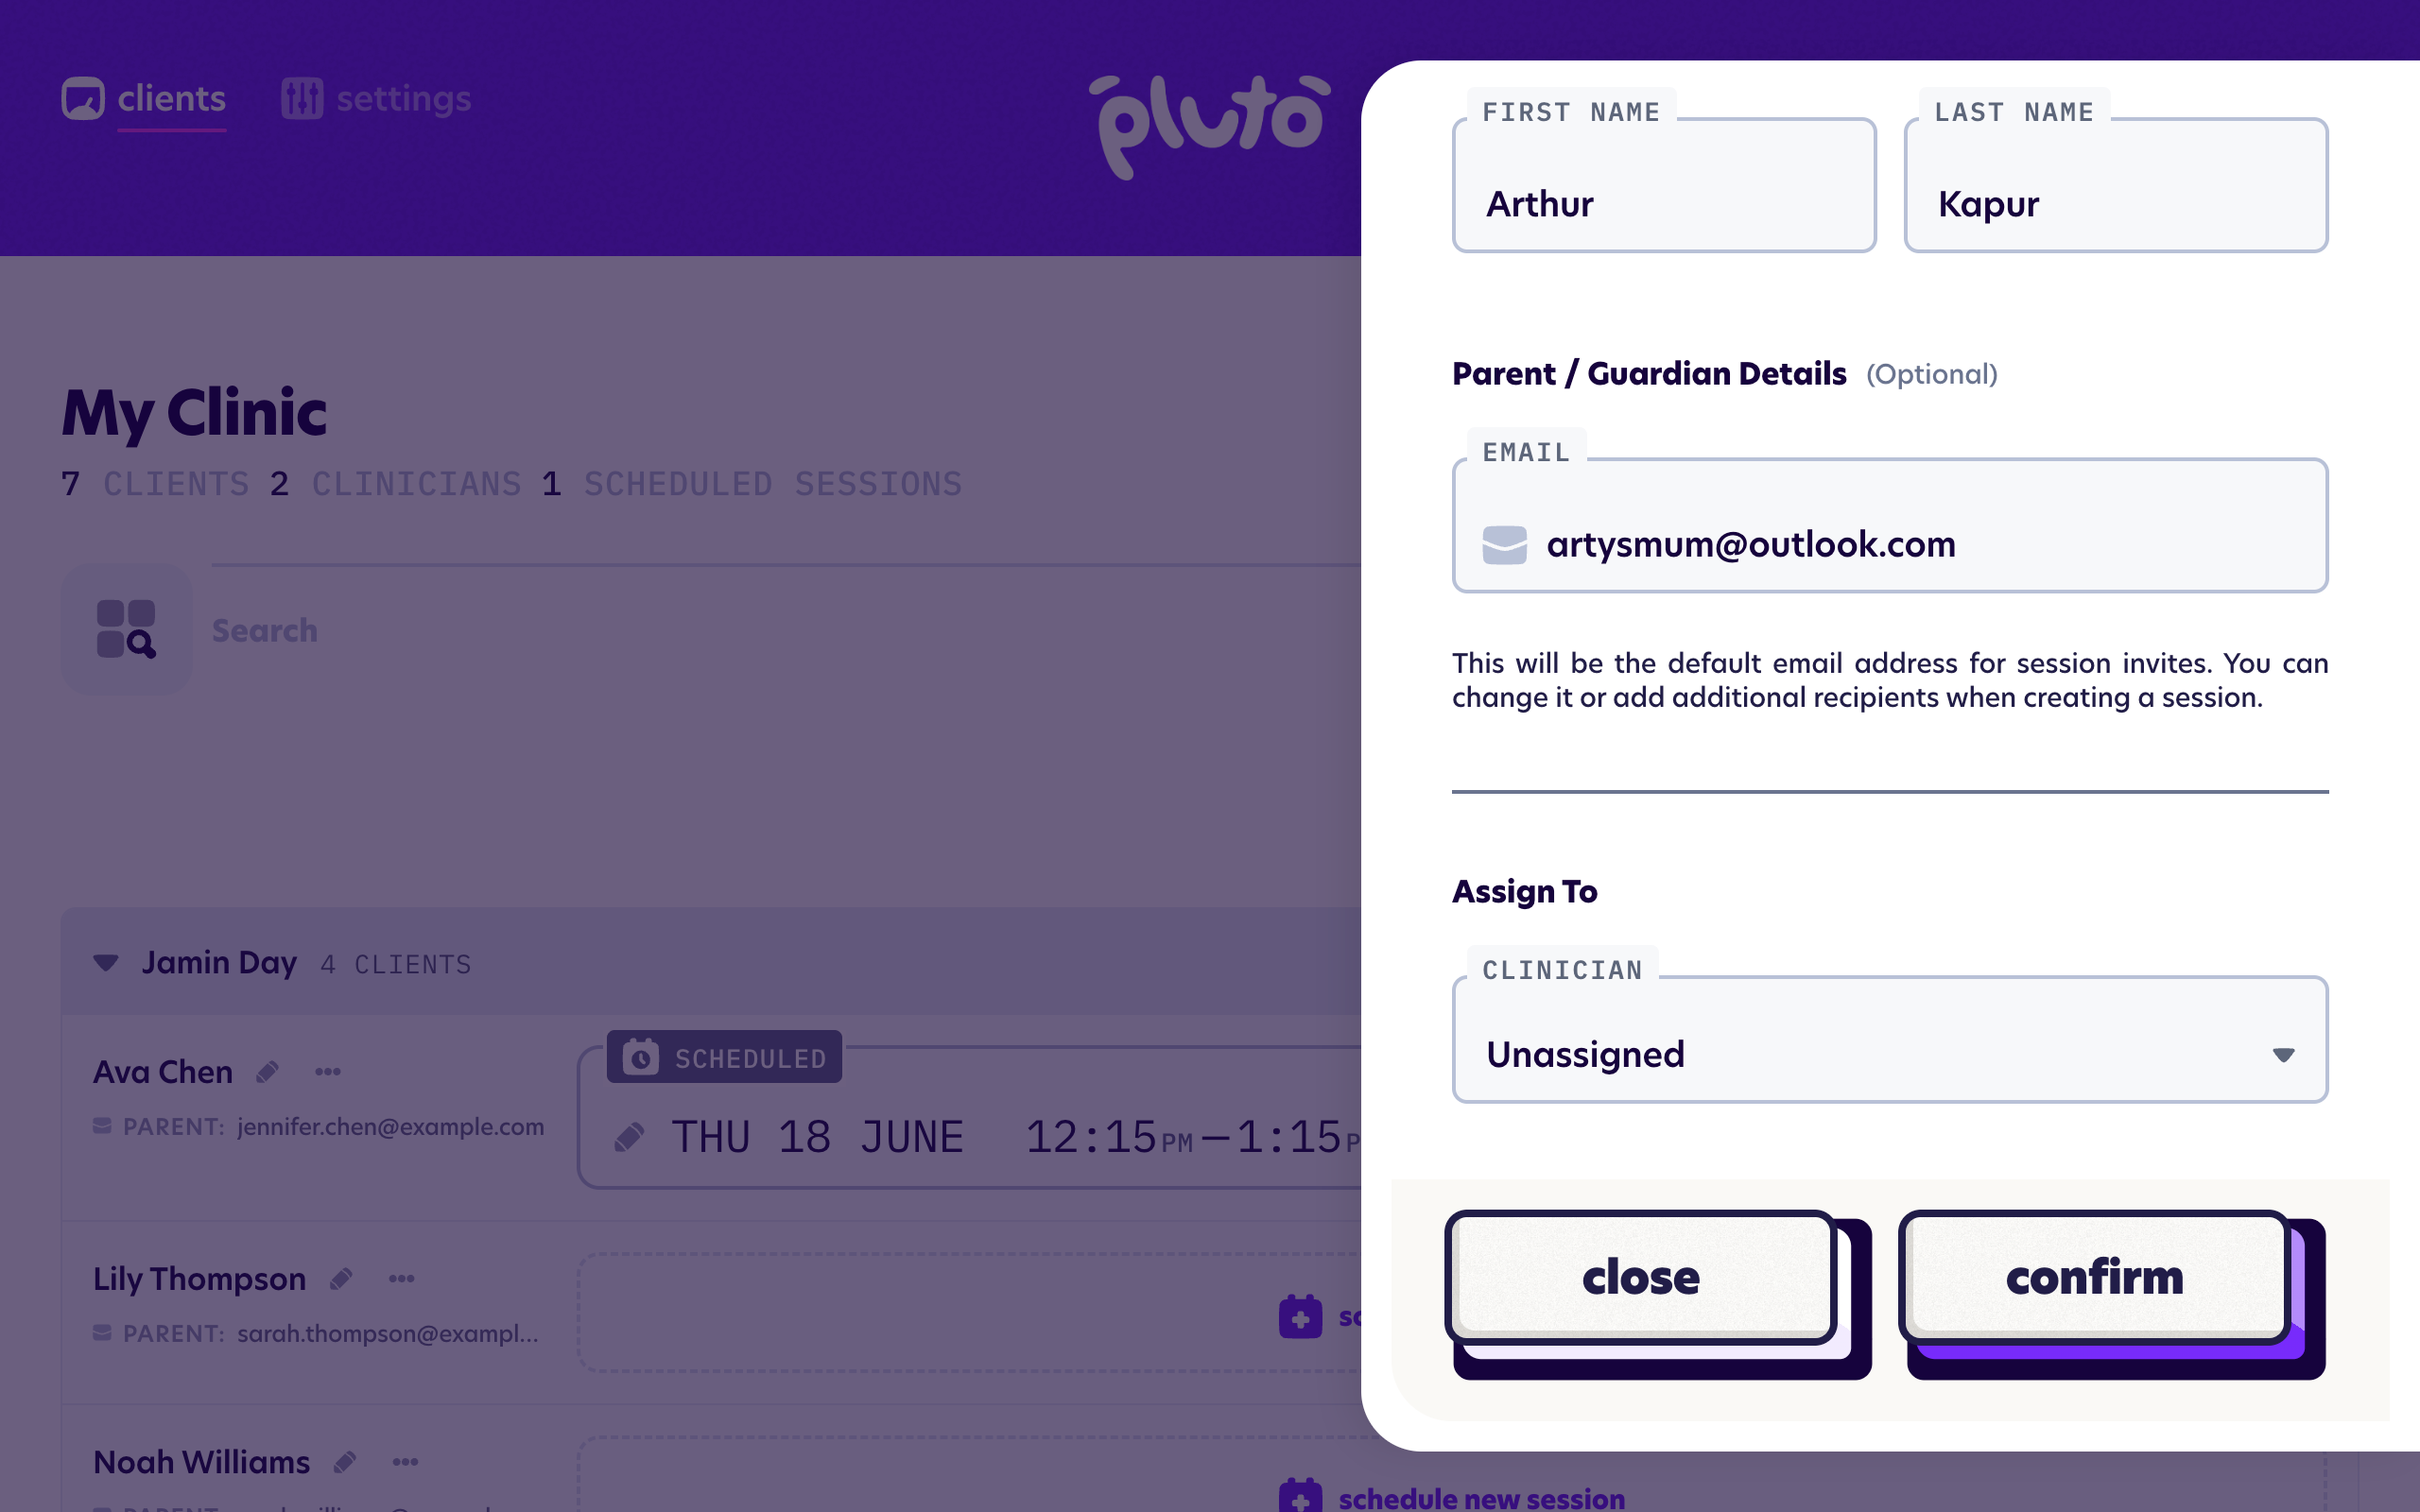
Parent and guardian details
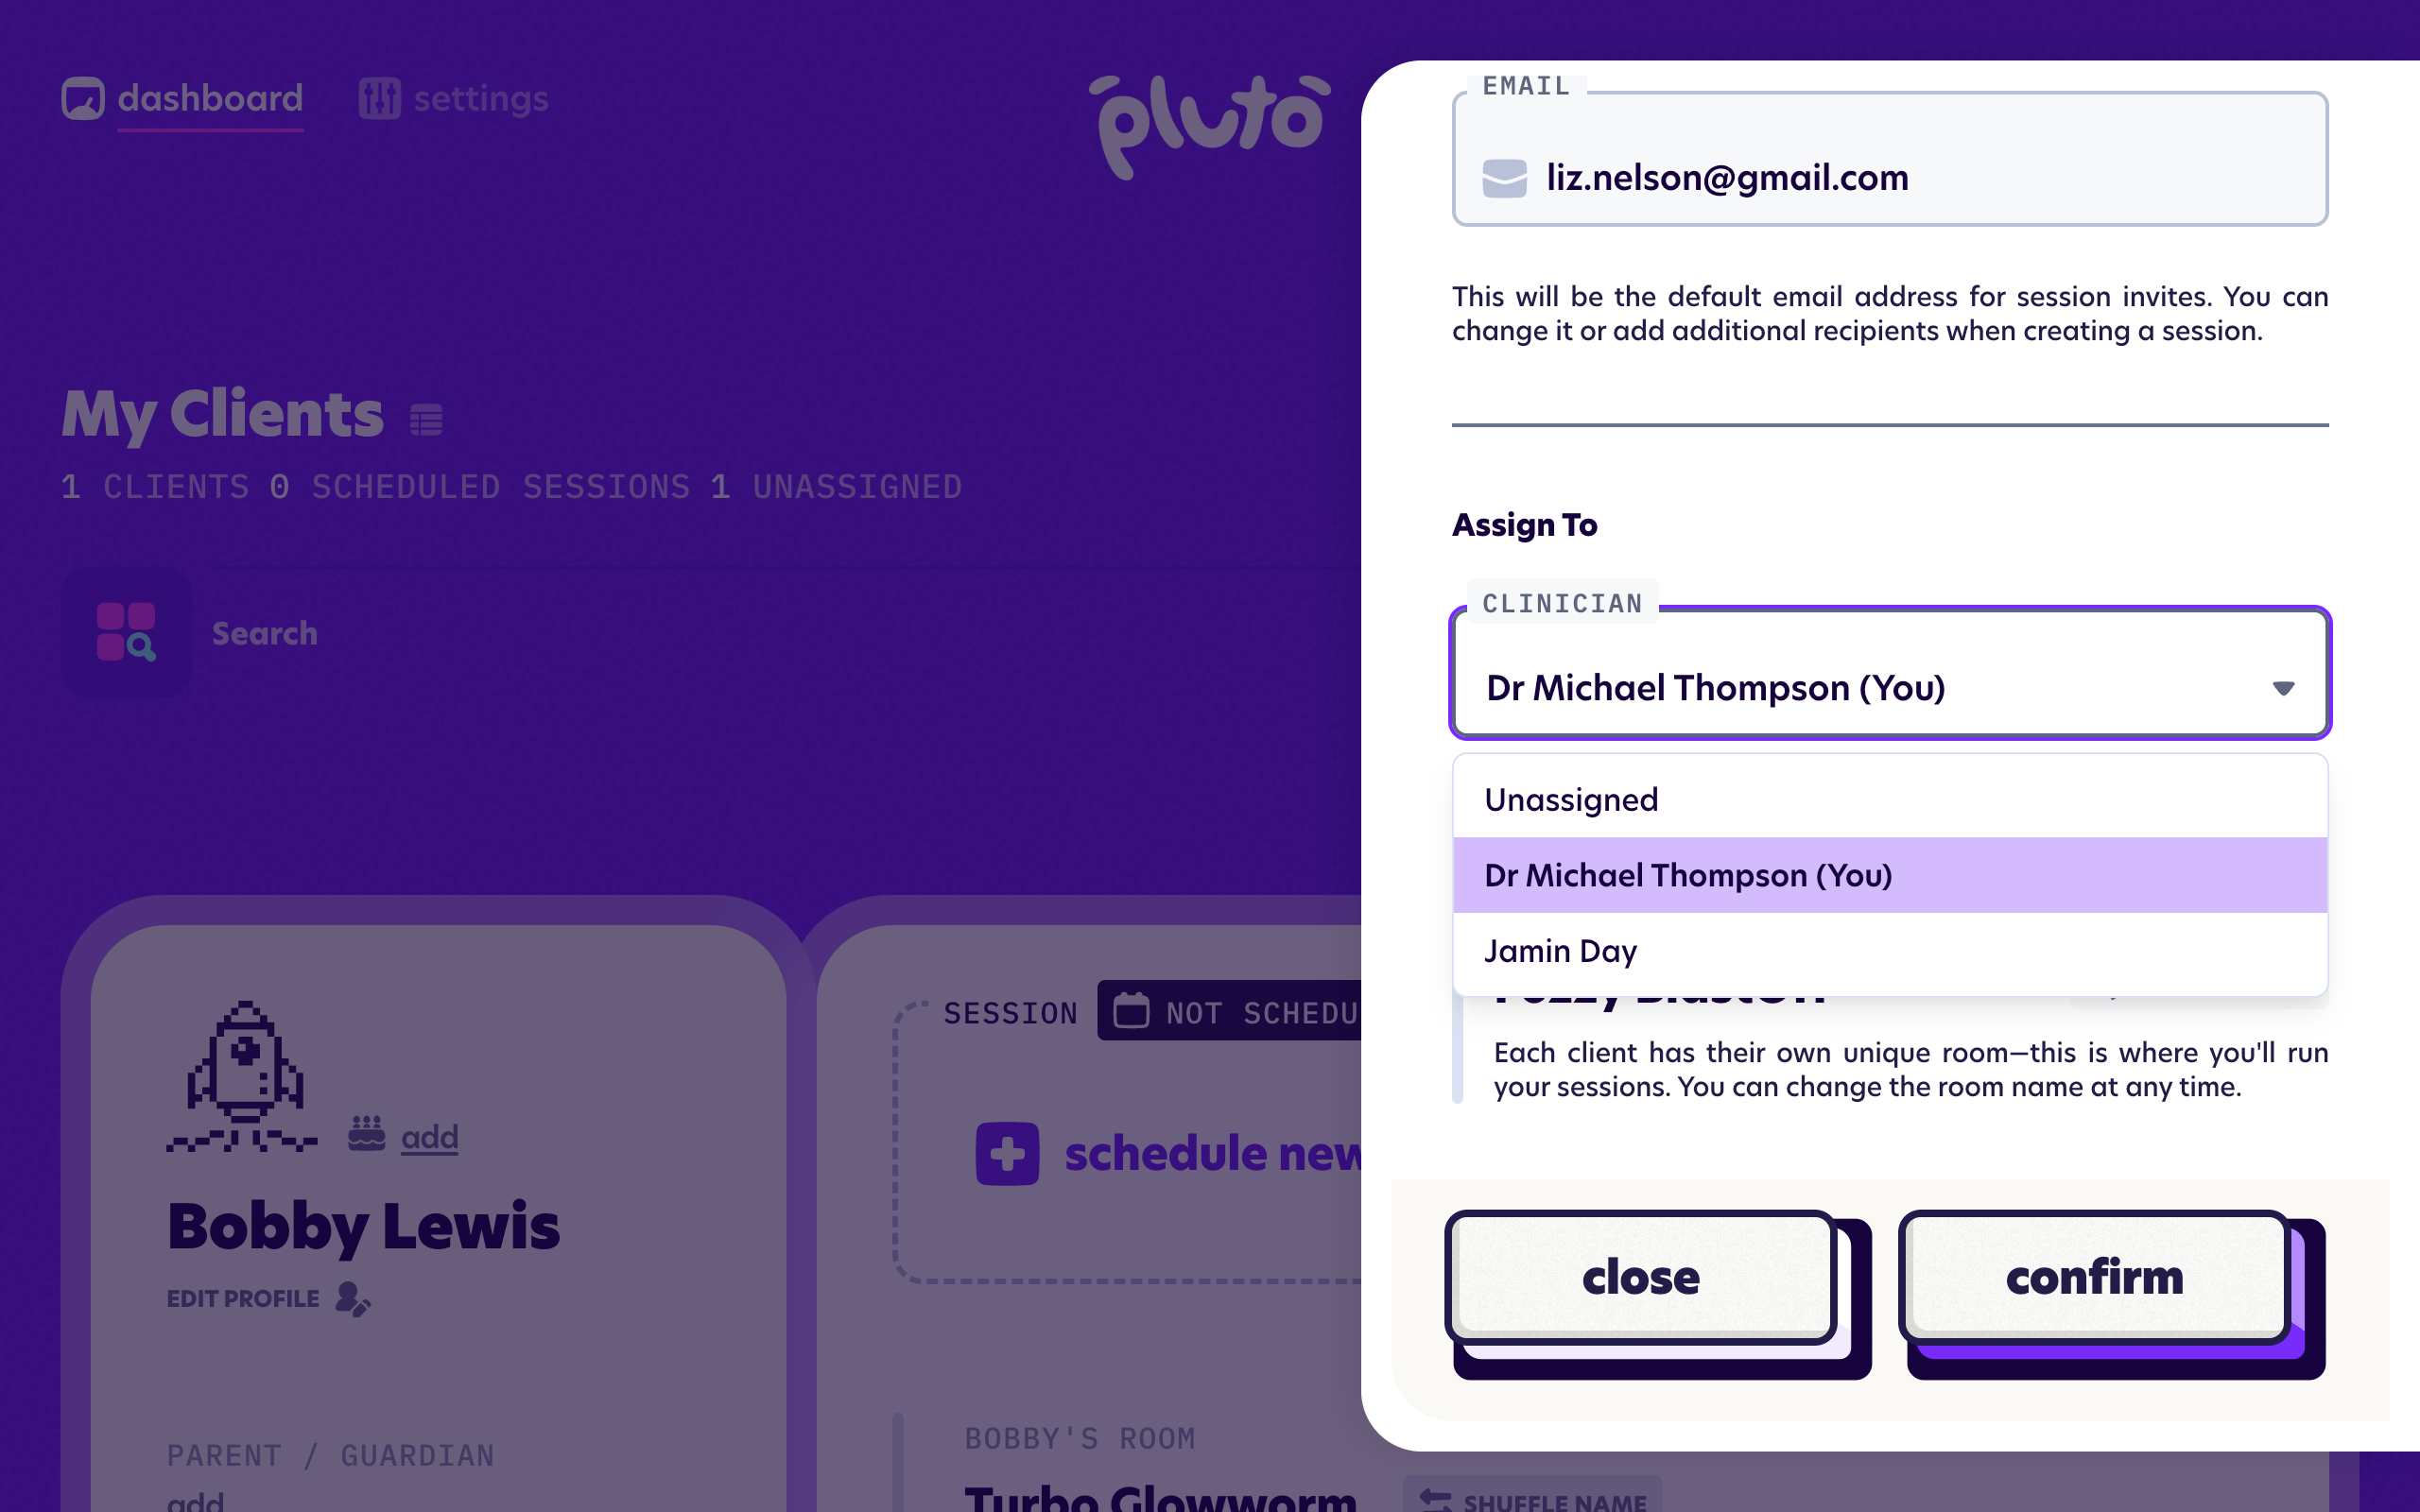
Adding a parent/guardian email address will set it as the default email address for sending session invites. You can add or change recipients each time you create a session, so you're never tied to a single contact.
Sometimes the primary email address for a client's session invites is NOT the same as the parent/guardian email. You can read more about how to set this up at the Contacts & email invites guide.
After saving the client, you can add additional contact details like a mobile number or the child's date of birth by editing the client. Read more at the Editing a client guide.
Assigning the client
Use the Assign To dropdown to choose the clinician who'll be looking after this client. You can also choose Unassigned if you'd like to add the client now and decide who looks after them later. An unassigned client can be assigned to a clinician at any time from their edit screen.
After you save
Once you save, your new client appears on the dashboard ready for you to schedule their first session.